Welcome to our comprehensive guide on how to stretch and shape pizza dough like a pro! Crafting the perfect pizza starts with the foundation – the dough. Whether you’re a seasoned pizzaiolo or a home cook looking to elevate your pizza game, mastering the art of stretching and shaping dough is essential. In this article, we’ll walk you through step-by-step techniques to achieve that ideal thin crust or thick, pillowy base, ensuring your pizzas turn out irresistibly delicious every time. From understanding the dough’s behavior to proper hand movements, we’ve got you covered. Get ready to learn the secrets to achieving that coveted crispy yet chewy crust and creating pizzas that rival your favorite pizzeria’s.
7 Steps On How to Stretch and Shape Pizza Dough
1. Preparing Your Work Surface
Before diving into the art of stretching and shaping pizza dough, the initial step is to properly prepare your work surface. This is crucial as it prevents the dough from sticking, which can tear it and affect the final outcome of your pizza. Start by cleaning your countertop thoroughly to remove any debris or particles that could stick to the dough. Once clean, sprinkle a generous amount of flour over the surface. Some prefer to use a blend of flour and semolina or cornmeal, as these can add a subtle texture and flavor to the crust while ensuring the dough doesn’t stick.
Beyond just flouring the surface, it’s important to also prepare your hands by dusting them with flour. This prevents the dough from sticking to your skin, making it easier to manipulate. Ensure the dough has been properly proofed and is at room temperature, as cold dough is more resistant to shaping. The goal here is to create a non-stick environment that welcomes the dough to be stretched and shaped without any hindrance, setting the stage for a perfect pizza base.
Also Read: 7 Homemade Pizza Recipes That Are Faster Than Delivery
2. Starting the Dough Ball
The journey to a perfect pizza crust begins with a well-formed dough ball. This is a step often overlooked but is essential in achieving a uniform thickness and texture in your crust. Begin with dough that has already doubled in size through the first rise, as this indicates that the yeast has done its job in fermenting the dough, creating the necessary gases for leavening.
To start the dough ball, gently deflate the risen dough on your floured surface and begin to gather the edges towards the center. This process not only helps to push out any large air bubbles but also starts to form the gluten network that will give your crust its structure. Knead the dough gently, pushing it down and away from you with the heels of your hands, then folding it back over itself. Rotate the dough 45 degrees and repeat this process for a few minutes until the dough feels smooth and elastic.
Once the dough feels ready, shape it into a tight ball by pulling the sides under and pinching them together, creating tension on the surface. This tension is key to getting a round, even crust as you begin to stretch and shape the dough further.
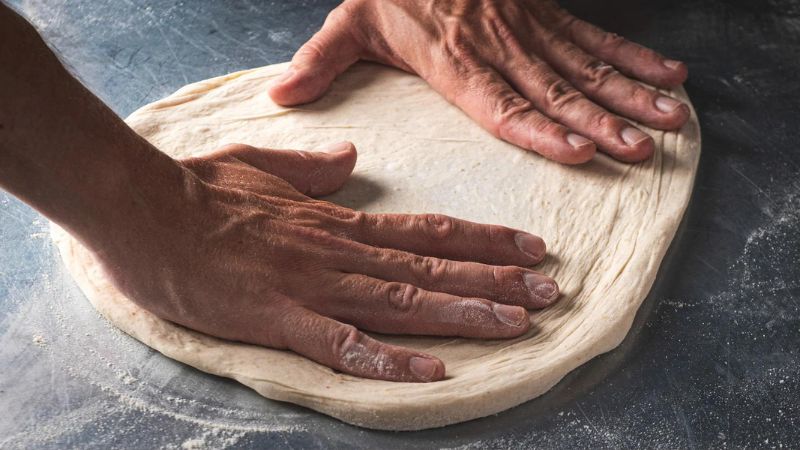
3. The Initial Flatten
Before stretching the dough, you must start by flattening it into a disk. This step is foundational, setting the stage for an even stretch later on. Place the dough ball on your floured surface, and using the palms of your hands, gently press down from the center, moving outward. This motion shouldn’t be forceful; the idea is to spread the dough while maintaining its integrity and round shape.
Keep the thickness in the center slightly less than at the edges to create a natural lip for the crust. This differentiation in thickness is crucial for a well-baked pizza, where the center cooks through without burning the edges. Allow the dough to rest for few minutes if it rebounds before proceeding. This resting allows the gluten to relax, making it easier to shape without risking overworking the dough.
4. Hand Stretching the Dough
Hand stretching is where the magic happens, and you begin to see the shape of your future pizza. Place your flattened disk of dough on the back of your hands, making sure your knuckles are underneath and not your fingertips, to avoid poking holes. From this position, gently rotate and stretch the dough, using gravity to assist in the process. Your hands should move apart slightly as the dough expands.
Here, gentleness and patience are crucial. The dough should not be rushed or overstretched, as this can lead to tears or an uneven base. If at any point the dough resists or starts to shrink back, place it back on the floured surface, let it rest, and then continue the process. The goal is to achieve a uniform thickness across the dough, with a slight edge around the circumference for the crust.
5. Using a Rolling Pin (If Necessary)
While hand stretching is often preferred for its ability to create a light, airy crust with a beautiful, irregular edge, there are times when a rolling pin might be necessary. This could be due to the dough’s elasticity or simply personal preference. If using a rolling pin, start from the center of the dough and work your way outward, applying even pressure to maintain uniform thickness.
Be mindful to not roll over the edges, as this will compress the rim, resulting in a flat, lifeless crust. Additionally, frequent turning of the dough ensures an even shape and thickness. This method might not give you the same artisanal feel as hand stretching, but it can help achieve a consistent base, especially for beginners or when dealing with particularly stubborn dough.
6. Fine-Tuning the Shape
After the initial stretching, it’s time to fine-tune the shape of your pizza dough. This involves carefully inspecting the dough for any uneven thickness or irregularities in shape. If you find thicker areas, gently stretch them out by placing them on the back of your hands and allowing gravity to help thin the dough to the desired thickness.
For shaping, you can also use your fingertips to gently press and stretch the dough out on your work surface, rotating it to ensure an even circle. This step is about precision and achieving the desired final form for your pizza. Remember, perfection isn’t the goal; character and consistency are.
7. Final Adjustments and Transferring to a Peel
The last step before topping and baking your pizza involves making any final adjustments to the shape and thickness of the dough, then carefully transferring it to a pizza peel or an alternative baking surface. Sprinkle the peel with flour or cornmeal to prevent sticking, ensuring a smooth transition to the oven. Gently lay your shaped dough onto the peel, making any last-minute adjustments to its shape or distribution.
This is also the moment to fix any imperfections or re-establish the crust edge by pinching or folding slightly. The dough is now ready for your favorite toppings, after which it should be transferred to the oven with a quick, confident jerk to slide it off the peel and onto the baking stone or tray. With practice, this process becomes second nature, leading to countless homemade pizzas that are as rewarding to make as they are to eat.
Also Read: How to Make Pizza at Home That’s Better Than Takeout
Conclusion
Now armed with the knowledge and techniques for stretching and shaping pizza dough, you’re well on your way to creating homemade pizzas that rival those from your favorite pizzerias. Recall that practice makes perfect, so don’t give up if your initial efforts don’t turn out perfectly. Experiment with different techniques and dough recipes until you find what works best for you. With patience and dedication, you’ll soon be delighting friends and family with mouthwatering pizzas customized to your liking. So roll up your sleeves, preheat that oven, and get ready to impress with your pizza-making prowess!
FAQs
How can I prevent my pizza dough from shrinking during stretching?
To prevent dough shrinkage, ensure your dough has properly proofed, and allow it to rest at room temperature before stretching. Additionally, gently stretch the dough from the center outward, using your fingertips to avoid tearing.
Can I freeze pizza dough for later use?
Yes, you can freeze pizza dough. After it has been shaped into balls, wrap each dough ball tightly in plastic wrap and place them in a freezer bag. When ready to use, thaw the dough in the refrigerator overnight before allowing it to come to room temperature for about an hour before stretching and shaping.